Brian Milnes

carpet edge binding options

What Are Your Carpet Edge Binding Options?

If you want to finish your rug edges to prevent them from unraveling, you have choices. Bond Products offers a variety of carpet edge binding options that you can use to create practical and stylish carpets and rugs. Let’s go through them. 

Your Carpet Edge Binding Options

carpet binding tape

Standard Edge Binding

This binding option involves using a durable, colorfast synthetic fabric tape that is designed to blend with the rug edge and not stand out. This is the most common and economical edge binding choice. Carpet binding commonly requires a carpet binder. For individual projects or DIYers, we offer Instabind carpet binding tape in many different styles.
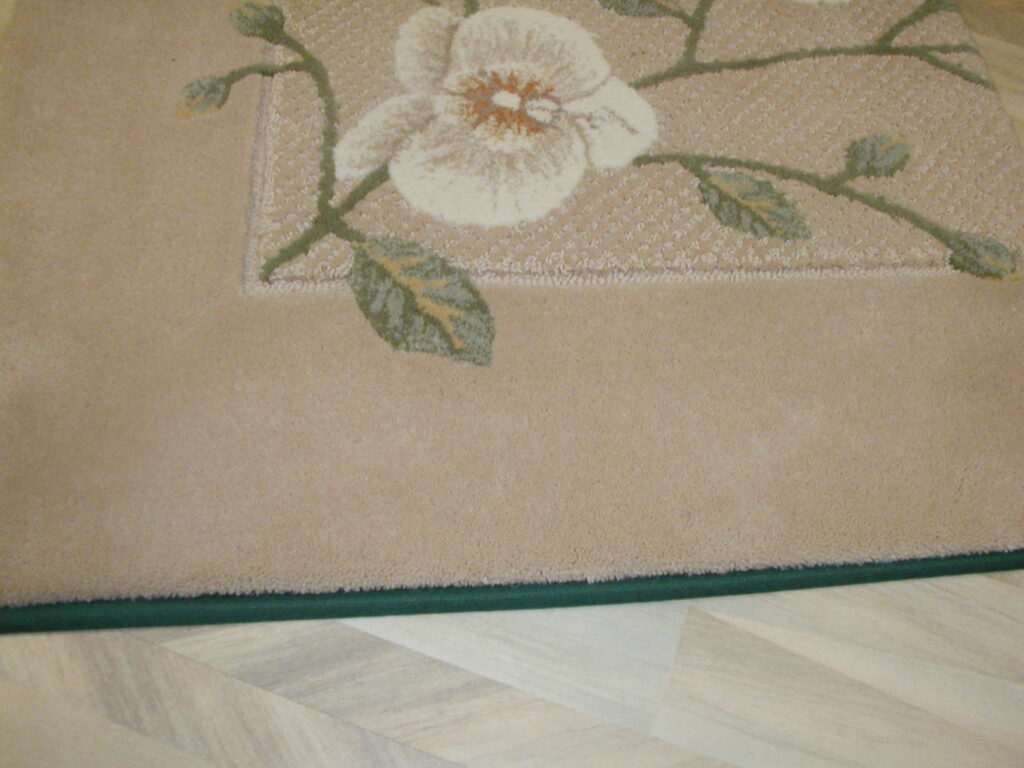
carpet serging

Serging

Carpet serging uses a continuous wrap of yarn, about 3/8ths of an inch wide, around the edge of a rug. It looks very similar to a traditional whip stitch, except that the yarn is even closer together. This gives the rug a more finished look. The yarn color usually blends with the rug’s background color or highlights a color in the rug pattern that the customer wants to emphasize. Carpet professionals use a carpet serger because serging by hand is extremely time consuming. 

Bond Products also offers serge style Instabind. It’s available in synthetic and cotton options. 
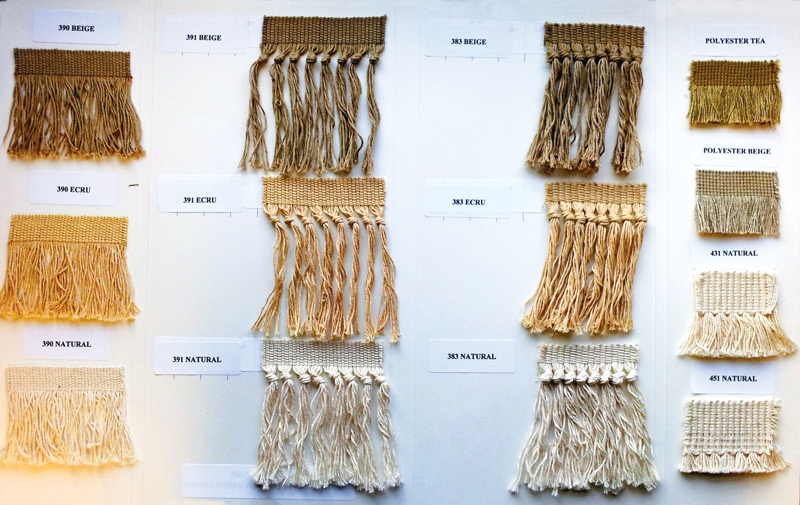
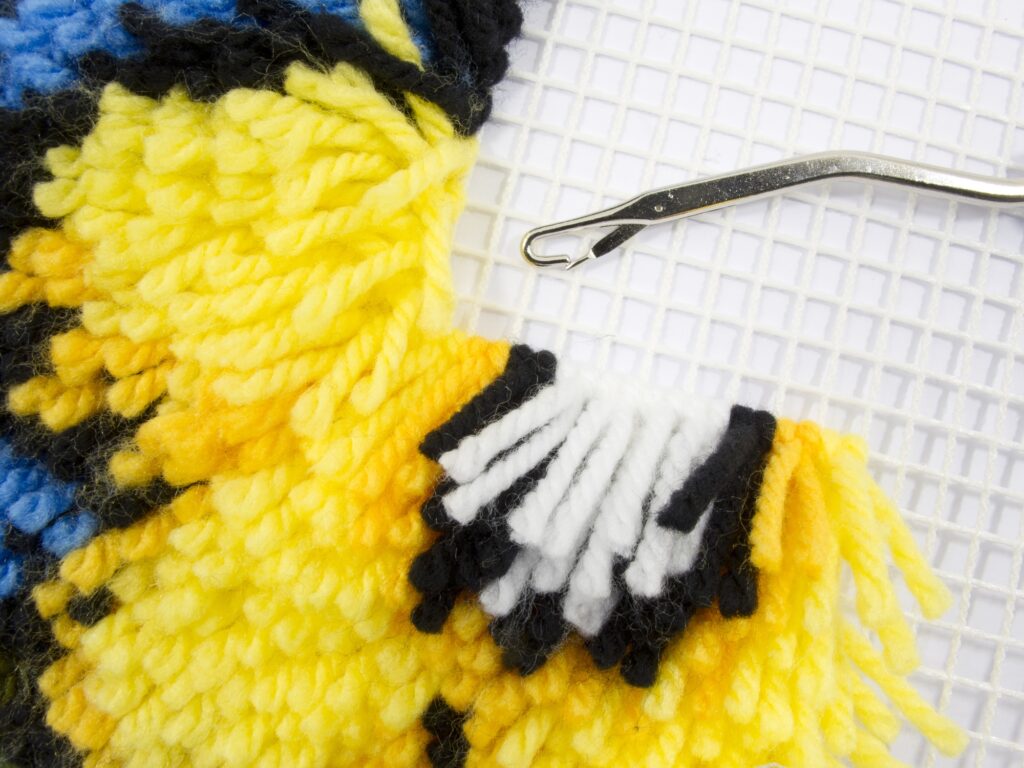
Fringe

On a traditional antique or Oriental rug, the fringes are the warps of the rug itself tied together to finish off the rug. On most modern rugs available in stores, the fringes are a decorative finish that can be replaced. Bond’s replacement rug fringes come in natural cotton in various colors and with or without knots.

We also offer Instabind fringe style for a faster, do-it-yourself project. 

Hand Binding

Hand binding is the least noticeable edge binding option. A cloth binding is sewn or stapled and glued with hidden stitching and wrapped tightly around the back. This is a subtle – but time consuming – rug binding choice that we offer our local customers. We also sell a heavy-duty hand-binding stapler for this job. 
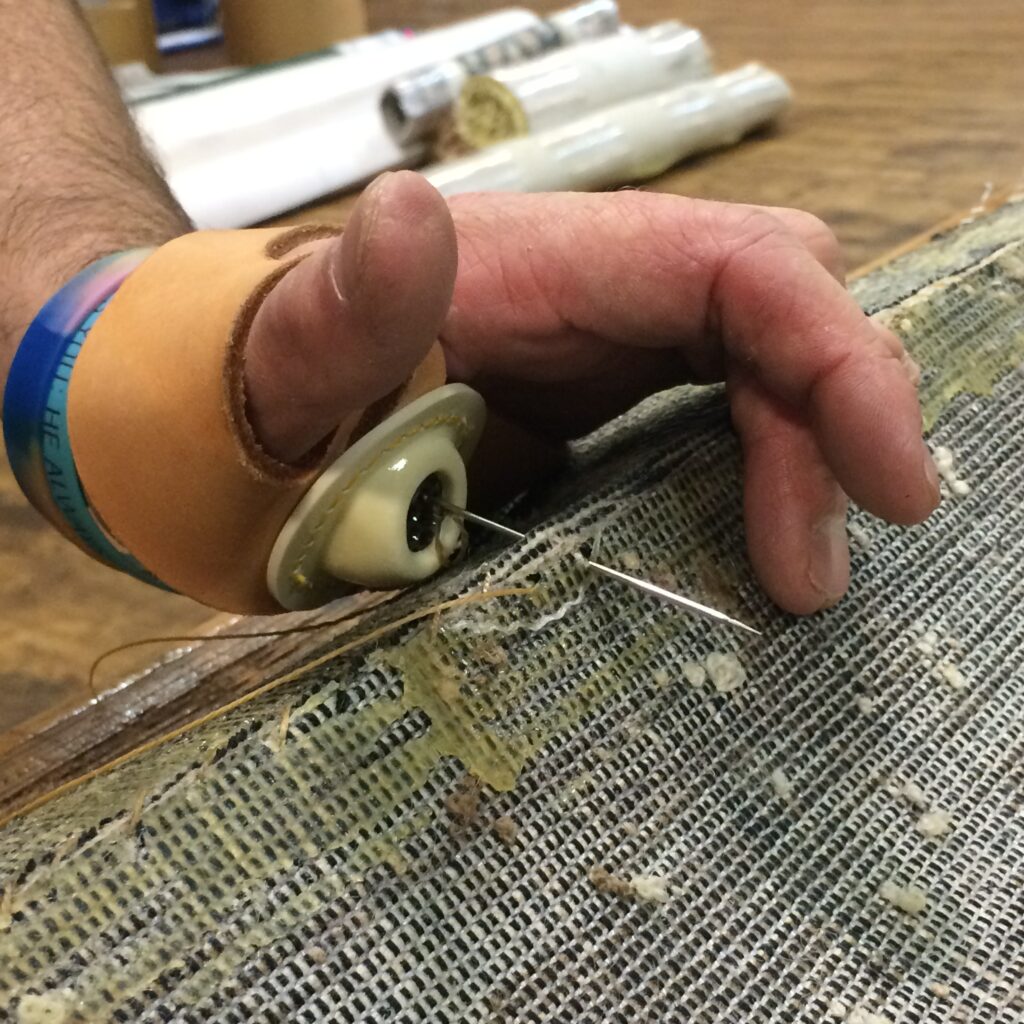
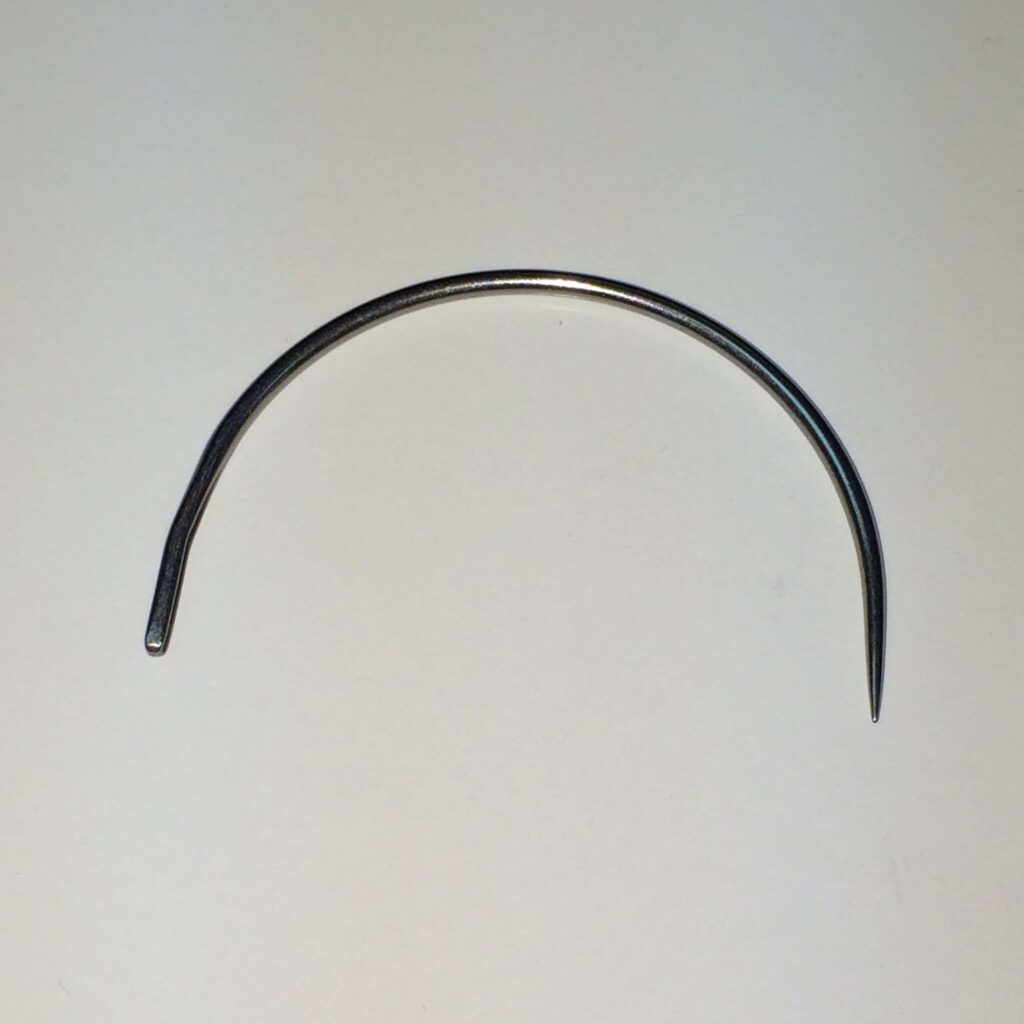
Hand Serging

Hand-sewn serging sits below the rug edge, creating a close-to-invisible effect. This is the most labor intensive edge treatment, but for customers with heirloom rugs it can be worth the investment.

binding corners

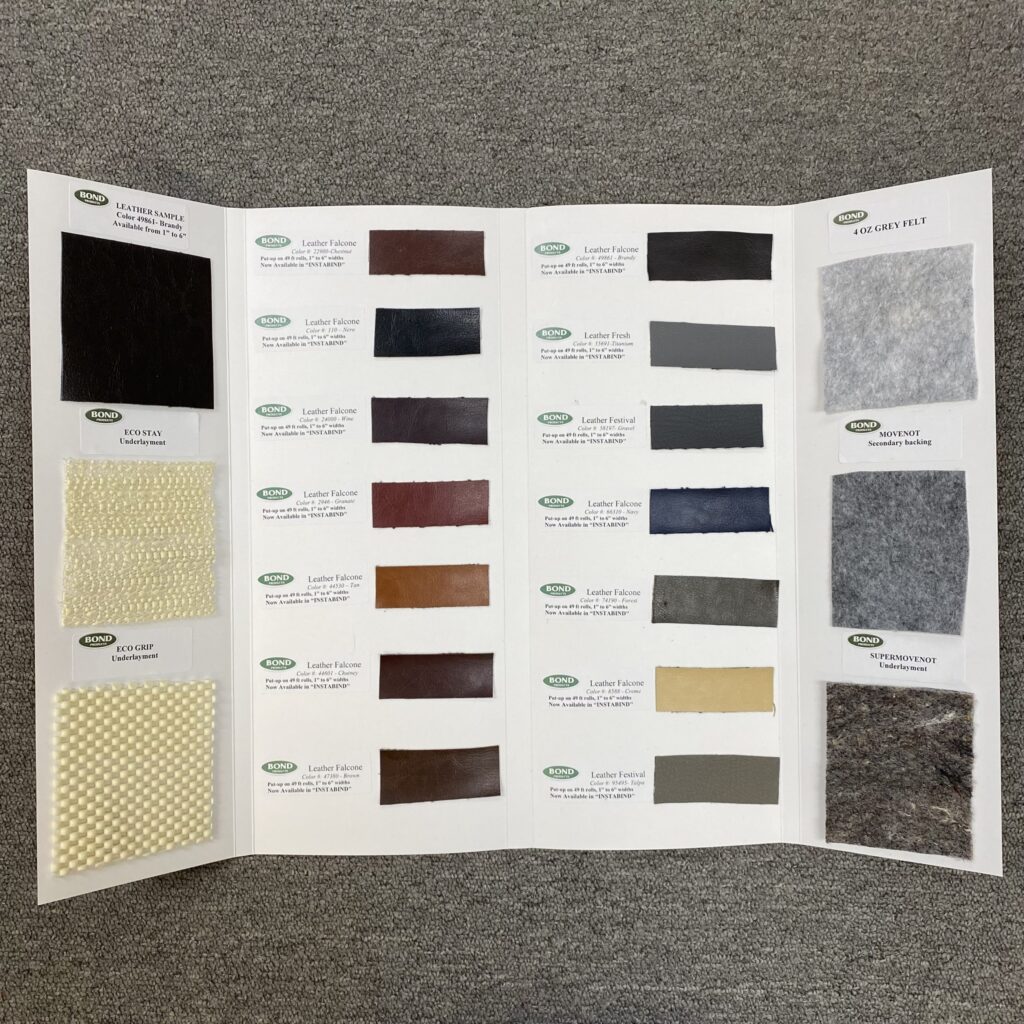
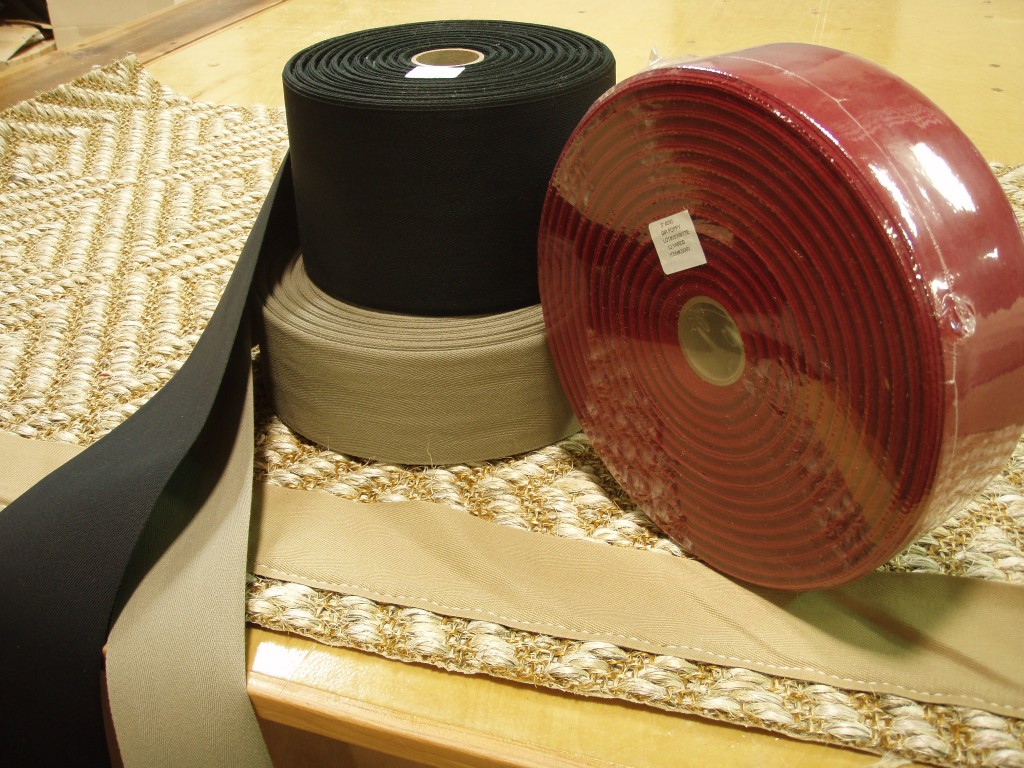
Wide Fabric Bindings

There are also a number of wide-fabric binding options. These add an accent to the edge of the rug and are often added to natural-fiber rugs like sisals. The stitching options available include top stitch and blind stitch, and the corner options include straight and mitered

Top Stitch – The top stitch binding style adds a visible seam to the edge of the carpet. This decorative stitch is sewn on top of the carpet, providing a neat and tailored finish. It not only prevents fraying but also introduces a subtle design element to the carpet’s edge.

Blind Stitch with Mitred Corners – The blind stitch, paired with mitred corners, is a sophisticated and seamless binding technique. In this method, the binding material folds over the edge of the carpet, concealing the stitch beneath. The corners are meticulously mitred, creating a clean and polished appearance. 

Blind Stitch with Straight Corners – For a clean and no-nonsense approach, the blind stitch with straight corners is a classic choice. The binding is stitched directly onto the carpet’s edge, providing a robust and durable finish. This style is great for high-traffic areas. 

Choosing the right carpet edge binding style depends on your preferences, the intended use of the space, and the overall design scheme of the room. Each style adds its own touch of refinement to your floors.

As always, Bond’s customer service team is happy to help you choose the best materials for your edge binding needs. Local customers, please make an appointment for your rug binding. Call us at 1 (888) 800-BOND with any questions you may have. 


What Are Your Carpet Edge Binding Options? Read More »

how to restore an antique rug

What to Do with a Worn Oriental Rug

Previously, we shared tips on how to restore an antique rug. Those ideas work when a rug is dirty, torn, or frayed along the edges. But what if the damage runs deeper? What if the rug feels beyond repair? You still have options. Here’s what you can do with an Oriental rug that no longer works on your floor.

Layer Your Rugs  

If the center looks worn or stained but the borders still shine, layer another rug on top. You’ll hide the damage and keep the character. Rug layering is popular right now, so the look feels intentional. It also helps fill a large room without buying one oversized rug. If you don’t have a spare, ask friends or family. Someone may have an older rug they no longer use.

Donate Your Rug 

A worn rug may still carry historical or artistic value. Local museums, historical societies, or nonprofits may accept it. If the organization qualifies as a 501(c)(3), you may be able to claim a tax deduction. Even without a deduction, donation keeps the rug in use instead of sitting in storage.

Repurpose Your Rug 

Oriental rugs are woven on warp threads that form the rug fringe, so you can’t trim them like standard carpet. But a skilled upholsterer can turn a salvageable section into a smaller rug, pillow, wall hanging, or upholstered stool. The final piece depends on how much of the rug remains intact. If the rug holds sentimental value, repurposing preserves its story while removing the damaged areas.

If none of these options fit, offer the rug to friends or young homeowners who enjoy restoration projects! Oriental rugs are works of art. If any part still holds life, it deserves another use rather than the landfill.

If your Oriental rug needs professional edge repair, fringe replacement, or finishing after repurposing, Bond Products has the supplies and expertise to help. From binding tapes and fringe to rug backing and repair tools, we’re here to make restoration possible. Call us at 1-888-800-BOND with your questions. We’re always happy to help you find the right solution and give your rug its next chapter.


What to Do with a Worn Oriental Rug Read More »

hand sewing

Hand Sewing and Waxed Thread

Bond Products carries a full line of hand-sewing supplies, including waxed thread, needles, and gloves. Our hand-sewing gloves protect your hands when you sew hard-backed carpet together and make the work more comfortable.

Hand Sewing Applications

Most installers now use nails or hot glue. So when does hand sewing make sense? Years ago, apprentices proved their skill by sewing carpet scraps into tool bags. While that tradition has mostly faded, the technique still has value. Installers often hand sew around bull-nose stairs, where nails can damage the edge. Sewing protects the stair profile and creates a cleaner finish than a nailed cap and band.

Hand sewing also works well on small or detailed jobs. It’s especially helpful when a heat seamer feels impractical or too aggressive. Many specialty carpets demand that level of precision.

Uses for Waxed Thread 

Waxed thread is quite useful when you re-fringe an antique rug. First, secure the rug’s edge so it will not unravel. Make sure the replacement fringe will not fray. Sew a blanket stitch along the damaged edge with waxed thread to reinforce the rug. Then sew the new fringe to the base of the existing one. Double-stitch the overlapping ends to prevent fraying.

Why choose waxed thread? The wax coating stiffens the thread and helps it resist water and mildew. It lasts longer under stress. Installers prefer it for hand sewing because wax can leave residue in machines and may melt under heat.

You can also use this thick, durable thread for other crafts, including leatherworking, jewelry making, saddlery, upholstery, and taxidermy.

Browse the Bond Products catalog for carpet installation and repair supplies. If you need it for the job, we likely carry it.

Hand Sewing and Waxed Thread Read More »

Did you get a new rug for Christmas? Here's what to do with an old rug

What to Do with an Old Rug During the Holidays

The holiday season is here, and for many households that means rearranging furniture, decking the halls, and adding festive flair to every room. While some people go all out with a full decor transformation, others prefer a simple change, like swapping out an everyday rug for a holiday-themed area rug. If you haven’t browsed seasonal rugs yet, you’ll be surprised at the variety available.

Holiday rugs aren’t just decorative—they also make great gifts. A well-crafted area rug can warm up bare floors and add charm to any room. But once you lay down your new rug, you might wonder: What should I do with my old rug?

Before you toss it, consider these creative and practical ideas for repurposing your area rug.

Repurpose an Antique Rug as Wall Art

In many cultures, rugs aren’t just for the floor, they’re displayed on walls like fine art. A small antique rug hung as a tapestry can add visual interest, texture, and even insulation to a room. Whether you’re decorating a hallway, living room, or cozy reading nook, a hand-woven rug can become a beautiful conversation piece.

Use Your Old Rug as a Creative Canvas

If your rug is stained, worn, or outdated, give it new life through creativity. You can:

  • Paint or stencil on it
  • Attach beads, patches, or glitter
  • Cut it into smaller shapes for doormats, car floor liners, or pet mats

This is a fun way to get the kids involved during winter break. Let them experiment with textures and designs. They’ll love making something new out of something old. Plus, it’s a great upcycling project if the alternative is throwing it out.

Keep It in Your Trunk for Practical Use

Here’s a smart and functional idea: store your old rug in your car’s trunk. It can protect your trunk interior from dirt, debris, or groceries. You can also take it out and use it as a picnic blanket, a tailgating mat, or a dry surface during outdoor events. Rugs provide better protection against moisture and cold than traditional blankets.

Don’t Toss It Yet—Reuse It Thoughtfully

Old rugs don’t need to end up in the landfill. Whether you turn them into art, craft supplies, or practical tools, they can still serve a purpose long after they’re retired from their original spot on the floor.

If you’re planning to buy a new rug this holiday season, think twice before tossing the old one. With a little creativity, your worn-out rug could still have a long life ahead!

What to Do with an Old Rug During the Holidays Read More »

Use Instabind to repair worn carpet edges

Worn Carpet Edges? Use Instabind to Replace and Freshen Your Rugs!

Spring and fall are great times to clean and refresh your home. While you’re deep-cleaning your carpet and your rugs, don’t forget to inspect them. If you notice fraying or worn edges, it might be time for a simple DIY carpet repair. One of the easiest ways to replace carpet edging and bring new life to your rugs is by using Instabind.

Here’s everything you need to know about how to replace carpet edging with Instabind, a fast, affordable, and professional-looking solution.

Why Carpet Binding Matters

Most people notice a rug’s pattern, material, or color first, but the binding is what gives the rug a clean, finished look. When edges are dirty, frayed, or damaged, the entire carpet looks tired and neglected. Fortunately, you can dramatically improve the look of your rug by reapplying a fresh binding, and Instabind makes the job simple enough to do yourself.

What You’ll Need

To apply Instabind, gather the following tools:

Step-by-Step Guide to Installing Instabind

1. Measure the Edge

Determine the total length of carpet edge you want to replace. This helps you calculate how much Instabind to order.

2. Choose Your Instabind Style

Instabind comes in a wide range of colors and nine different styles to suit various carpet types and aesthetics:

  • Regular
  • Cotton
  • Cotton Serge
  • Synthetic Serge
  • Faux Leather
  • Rope Edge
  • Outdoor Marine
  • Safety Edge
  • Fringe

Pick the Instabind style that best matches your rug’s material and purpose.

3. Prepare the Carpet Edge

Before applying the binding, remove any old carpet edge or trim. Use your scissors to cut away loose threads and straighten the edge. A clean and even surface will ensure a better bond.

4. Apply the Instabind Tape

Peel back the adhesive liner from the Instabind and stick it along the trimmed carpet edge. Start in the center of one edge and press firmly.

  • Extend the Instabind past corners, and use the corner as a guide to make small snips along the flat portion without cutting through the piping.
  • At corners, turn the tape back slightly and overlap the backing for a snug fit.
  • Continue around the entire carpet, returning to your starting point. Use this point as your guide to make the finishing cut. Trim any excess material or strings.

5. Secure with Hot Glue

Add a bead of hot glue where the beginning and end of the Instabind meet.

  • Apply a thin (⅛ inch) bead of glue between the edge of the Instabind and the carpet.
  • Hold in place for a few seconds until the glue sets.
  • Continue this gluing process around the entire carpet.

6. Trim the Excess

If any tape extends beyond the edge, trim it cleanly at a 45-degree angle using sharp scissors. This will help your carpet or rug look neat and professional.

That’s it! Your Instabind is applied, and you can return your refurbished rug to its original place in your home. 

Why Choose Instabind for Carpet Edge Repair?

Instabind is one of the most popular carpet binding solutions because it offers:

  • A DIY-friendly application process
  • A durable finish that helps prevent fraying
  • A wide variety of styles for different carpet types
  • A cost-effective alternative to professional re-binding services

Order Instabind from Bond Products

Using Instabind, you can easily refresh worn rugs and extend their lifespan with minimal cost. If you’re ready to take on this DIY carpet binding project, call Bond Products at 1-888-800-BOND. Our team can help you choose the right style and tools for your needs.


Worn Carpet Edges? Use Instabind to Replace and Freshen Your Rugs! Read More »

curved sewing needle

What Are Curved Sewing Needle Uses? A Handy Guide for Rugmakers and DIYers

Bond Products offers many types of needles for both carpet machinery and hand sewing. While most people understand how straight needles work, fewer realize how useful a curved sewing needle can be. These versatile tools are ideal for hand sewing, rug repair, upholstery, embroidery, and more. In this blog, we’ll walk through some of the most popular curved sewing needle uses.

Common Curved Sewing Needle Uses

Curved needles come in different lengths and thicknesses, and they’re essential for a variety of tasks performed by crafters, seamstresses, leatherworkers, upholsterers, and rugmakers. Here are some specific ways to use a curved sewing needle:

Upholstery and Mattress Repair

One of the most well-known curved sewing needle uses is upholstery work. Curved needles are often called upholstery needles because they’re used to stitch seams that can’t be fed through a sewing machine or pressed flat. This includes repairing furniture, cushions, lampshades, and even mattresses. Lampshades, in particular, require precision due to their exposure to light and heat, which can break down adhesives. A curved needle lets you stitch by hand without warping the surface.

Cushion and Pillow Repairs

Stuffed cushions and pillows are tough to repair with straight needles. A curved needle allows you to stitch through thick filling or stuffing without puncturing your fingers or needing to force the fabric flat.

Rug Mending and Carpet Repair

When repairing area rugs, especially while they’re still on the floor, a curved sewing needle makes the job much easier. It allows for more comfortable hand-stitching through thick carpet backing. Curved needles are especially helpful for pushing through heavy layers without straining your hands.

Embroidery and Hand Quilting

Quilters and embroiderers use curved needles for multi-layered fabrics. The curve provides better control and helps sew tight patterns without constant repositioning.

Beading and Jewelry Work

Straight needles can cause beads to fall off easily. A curved needle helps control bead placement on fabric, leather, or string when crafting or embellishing garments. They’re also used in jewelry making for the same reason.

Other Uses

Curved sewing needles are also used in:

  • Bookbinding
  • Basket weaving
  • Wig making
  • Leatherworking

Some people with arthritis or joint pain find curved sewing needles easier and more comfortable to use than straight ones.

Bond’s Curved Sewing Needle

Bond Products carries a high-quality 3-inch curved hand sewing needle perfect for upholstery, rug repair, and other heavy-duty tasks. This needle is strong and durable. If you’ve never used one before, don’t worry. There’s a learning curve, but plenty of online tutorials can guide you.

Here’s a video that shows how to use a curved needle for upholstery.

Need Help Choosing a Needle?

If you’re unsure whether a curved sewing needle is right for your task, give Bond Products a call at 1-888-800-BOND. Our experts can help you select the right tools for rug repair, carpet work, or any tough sewing job.


What Are Curved Sewing Needle Uses? A Handy Guide for Rugmakers and DIYers Read More »

Edgar Allan Poe quote about rugs

Poe on Rugs: Why the Right Rug Sets the Tone for Your Room

As fall creeps in with its shorter days and bare trees, it’s worth remembering something Edgar Allan Poe, master of gothic horror, once said about rugs.

How Did Edgar Allen Poe Feel about Rugs?

The soul of the apartment is the carpet.”

Poe wasn’t wrong. While his aesthetic was…particular (he also declared that “representations of flowers should not be endured within the limits of Christendom”), his larger point stands: rugs shape the atmosphere of a room more than any other single piece of decor.

Today, our tastes are more relaxed, and floral rugs are perfectly acceptable, even beautiful, but Poe’s broader idea about the importance of flooring still resonates.

Why Area Rugs Matter in Interior Design

The rug is the anchor of the room’s decor.

Flat surfaces are the base layer in any design, and a rug will naturally catch the eye, especially in open spaces. A large rug can influence the mood of a room more than a single piece of furniture or wall decor. That’s why it’s important to choose rugs with visual presence and appropriate weight.

The rug interacts with every other item in the room.

While it’s easy to hide a clashing pillow or lampshade in a corner, your rug sits beneath everything: the furniture, the curtains, and even the people. Because it touches, or is adjacent to, so many elements, a rug with strong patterns or bold colors can either unify your space or make it feel chaotic. This is why many designers advise decorating around the rug, rather than trying to fit a rug into a pre-designed space.

Clashing colors or textures create discomfort, even subconsciously.

Ever walk into a room and feel uneasy without knowing why? That could be due to mismatched decor, often from an uncoordinated rug. Some visitors will silently critique it; others might mentally redecorate your entire space. The rug is usually where that discomfort starts.

Poe’s Carpet Philosophy in Today’s Language

Interior designers today echo Poe’s statement when advising clients: the carpet, or more commonly now, the area rug, does more than protect your floor. It defines your space. Our company motto at Bond Products—“Every hard floor needs a nice area rug”—is basically a modern version of Poe’s old-fashioned phrasing.

While he might faint at the sight of a modern abstract shag or floral design, Poe would likely appreciate the intention behind them: comfort, atmosphere, and aesthetic harmony.

Poe on Rugs: Why the Right Rug Sets the Tone for Your Room Read More »

Customer Appreciation Week 2025

Celebrate Customer Appreciation Week with Bond Products!

October 20–24, 2025 | Monday–Friday | By Appointment Only
Bond Products Inc., 4511 Wayne Ave, Philadelphia, PA 19144
📞 Call 888-800-BOND (2663) to reserve your spot today!

Bond's Customer Appreciation Week

We’re thrilled to invite you to our Customer Appreciation Week, a special time dedicated to thanking our loyal customers for supporting Bond Products. Whether you’re a carpet pro or just getting started, this is your chance to learn, save, and get hands-on experience with the tools and techniques that make carpet finishing a true craft.

What’s Happening During Customer Appreciation Week?

Here’s what you can expect — all by appointment only (no drop-offs, customers must be present):

Free labor on portable binder repairs (you just cover the cost of parts)
Free instruction on how to maintain and service your binder
Free training on binding, serging, beveling, and fringing techniques
10% off all Bond equipment and supplies
Trade evaluations on your current equipment if you’re thinking about trading up

Why Attend?

This is more than just a week of discounts — it’s an opportunity to:

  • Meet our expert team

  • Watch live demonstrations

  • Ask questions about equipment, accessories, and techniques

  • Test products firsthand

  • Learn how to get more out of your machines

Whether you’re working with remnants, creating custom rugs, or restoring high-value pieces, Bond has everything you need to get the job done — and do it well. From tapes and tools to full-size machines and refurb options, our team is here to guide you.

Bonus: Save on Equipment All Week

We’ll be offering exclusive 10% savings on all Bond equipment and supplies — whether you’re buying new, refurbished, or looking for replacement parts. Don’t forget to check out our Clearance section for even deeper discounts.

Schedule Your Appointment

To ensure you get personalized attention and repair time, call 888-800-BOND (2663) to book your slot. Free labor is limited to portable binders, with a cap of two per customer and 30 minutes of free service. Additional time is subject to billing.

We can’t wait to see you! Thank you for choosing Bond Products — where professional service, hands-on help, and carpet finishing excellence come together.


Celebrate Customer Appreciation Week with Bond Products! Read More »

carpets insulate

How Carpets Help Insulate Your Home and Keep You Comfortable

At Bond Products, our motto is simple: “Every hard floor needs a nice area rug.” Rugs and carpets are more than just beautiful design elements. We’ve often explored the appeal of various styles like shag rugs, gray carpeting, and sisal rugs, all of which enhance the appearance and comfort of a room. While most people recognize the aesthetic value of carpets, fewer remember their practical benefit: carpets help regulate temperature and make spaces feel warmer.

Carpet as a Natural Insulator

Carpets are not heat sources, but they do help retain heat. This is because carpet acts as a natural insulator. Unlike hard surfaces such as tile, marble, or concrete, which are good conductors and pull heat away from your body, carpet works the opposite way. It slows heat transfer and helps maintain a cozy environment.

Imagine stepping barefoot onto a cold concrete floor. The concrete quickly pulls warmth away from your feet, making you feel chilly. Now imagine stepping onto a thick rug instead. The carpet keeps the warmth where it belongs: with you. In a sense, adding carpet is like putting a coat on your floor.

How Well Does Carpet Insulate?

Not all carpet insulates equally. The thickness, materials, and installation type all influence how much insulation a carpet provides. Wall-to-wall carpeting insulates more effectively than area rugs, and thicker carpet generally offers higher thermal resistance.

Thermal resistance is measured using an R-value. The higher the R-value, the better the material resists heat flow. To give you perspective:

  • Concrete (10 cm thick): R-value of 0.07
  • Fiberglass insulation (1 cm thick): R-value of 0.22
  • Carpet (1 cm thick): R-value of 0.18

This means carpet comes surprisingly close to insulation material in effectiveness. It can play a key role in reducing heating and cooling costs throughout the year.

Save Energy and Increase Comfort

Because carpet reduces heat transfer, it lowers the energy needed to keep a room warm in the winter or cool in the summer. If your home has cold floors, an area rug is an easy and attractive way to improve insulation and comfort.

Floors can account for 10 to 20 percent of a home’s total heat loss, especially if they are uninsulated. Whether you’re building a new home or trying to reduce energy use in an older space, choosing the right carpet can make a significant difference in both temperature control and utility bills.

Carpets Make a House a Home

While carpets are often used to add color, texture, or visual balance, their ability to create warmth and softness underfoot is just as important. Throughout human history, rugs and carpets have made homes more livable, and that hasn’t changed. Can you imagine living without them? Most people wouldn’t want to.

How Carpets Help Insulate Your Home and Keep You Comfortable Read More »

smooth cut shears

What’s the Difference between Scissors and Shears?

Scissors vs. Carpet Shears: What’s the Difference 

Do you know the difference between scissors and shears? Many people use the words interchangeably, assuming they’re the same thing. But in the world of textiles and carpet work, they are very different tools — and choosing the right one can make all the difference.

If you’re working with carpet or other heavy-duty materials, having a quality pair of carpet shears is a must. Let’s break down the differences and help you understand when and why shears are the better option.

What Are Scissors?

Everyone knows what scissors are… or do they? Scissors are a specific type of cutting tool defined by two main features:

  • Blade length: Less than 6 inches
  • Handle shape: Two symmetrical, equally sized finger holes

Standard or office scissors are designed for general use, including cutting paper, opening packages, and completing light household tasks. They typically have straight blades and are inexpensive and easy to find.

However, scissors are not ideal for fabric or carpet. Using the same scissors for both paper and fabric will quickly dull the blades, which can lead to tearing or jagged cuts.

Scissors vs. Shears: What’s the Difference?

Shears are specifically designed for heavier-duty use and offer greater cutting control and strength. Here’s how they differ from standard scissors:

  • Blade Length: Shears usually have longer, sharper blades, allowing for smoother, cleaner cuts.
  • Handle Design: Shears feature two different-sized finger holes. The smaller one is for your thumb, and the larger one is for multiple fingers, giving you a stronger grip and better leverage.
  • Performance: Because of their sharpness and ergonomic grip, shears can cut through tough materials like carpet, upholstery, and thick fabrics without fraying or dragging.

This added control and power make shears the preferred tool for professionals working in flooring, upholstery, or textile production.

Bond’s Smooth Cut Carpet Shears

If you need shears you can rely on, Bond Products offers some of the best on the market. Our Smooth Cut Shears are high-quality, ergonomic, and built for durability and performance.

Key Features:

  • Available in six sizes, ranging from 8-inch to 12-inch heavy-duty options
  • Made with stainless steel blades and nickel-plated brass nuts
  • Soft elastomer handles for comfort and grip
  • Adjustable tension for optimal performance
  • Ambidextrous options available — suitable for left-handed and right-handed users
  • The 9-inch offset-handle shears are especially popular for cutting carpet with precision

These shears are ideal for both professional and DIY carpet work, and their razor-sharp edges will stay sharp for years to come.

Ready to Cut with Confidence?

If you’re working with carpet or heavy fabrics, investing in the right shears will make your work cleaner, faster, and more professional. Call 888-800-BOND (2663) for any assistance. Our customer service team is always ready to help you find the perfect cutting tool for your needs.


What’s the Difference between Scissors and Shears? Read More »

how to fix carpet seams

How to Fix Carpet Seams and Hide Them Like a Pro

Carpet seams can be one of the most frustrating challenges for homeowners and DIYers. Whether you’re installing new carpet or trying to fix damaged seams, one thing is certain: improperly seamed carpet looks bad. Uneven lines, visible gaps, or curling edges can make even new carpet look worn and cheap.

The good news? With the right tools, supplies, and know-how, you can repair and hide carpet seams like a prom, saving time, money, and the hassle of replacing your flooring.

Why Carpet Seams Come Apart

If your carpet has unsightly seams, the first step is understanding what went wrong. Most carpet seam issues fall into one of two categories:

1. Seam Peaking

Seam peaking happens when pressure causes the joined edges of the carpet to lift and form a raised line. It’s usually the result of using a seaming iron that’s too hot or stretching the carpet too tightly during installation.

2. Seam Splitting

Seam splitting is when the carpet comes apart at the seam, leaving a visible gap that may expose the subfloor. This problem often stems from long-term wear, low-quality seaming tape, or poor installation practices.

Tools & Supplies for Carpet Seam Repair

You don’t have to be a flooring professional to fix carpet seams—just gather the right tools:

With these on hand, you’re ready to get started.

How to Fix Carpet Seams

Depending on the severity of the issue, there are two main approaches:

For Minor Damage

If the seam is only slightly lifting or splitting in a low-traffic area:

  1. Lift the carpet edge slightly and apply hot glue along the seam.
  2. Press the edges together and weigh the area down.
  3. Let the glue dry for several hours.
  4. Use a seam comb to fluff and blend the carpet fibers.

This method works best for small repairs and light traffic zones.

For Heavier Damage

If the seam is more noticeable or located in a high-traffic area:

  1. Carefully remove the old seam tape from under the carpet.
  2. Cut new seaming tape to size and position it under the carpet edges.
  3. Heat your seaming iron and run it along the tape, pressing the carpet edges firmly into the melting adhesive.
  4. Apply weight to the seam area and allow it to cool completely.
  5. Once cooled, blend the fibers with a seam comb for a smooth, seamless finish.

Get the Right Products for the Job

At Bond Products, we carry everything you need to fix carpet seams and make your floors look flawless again. From carpet seaming tape to glue guns, seaming irons, and combs, we stock professional-grade tools trusted by installers nationwide.

And if you’re not sure which product is right for your carpet repair, we’re here to help. Call us at 888-800-BOND. Our friendly customer service team is always happy to answer questions and help you choose the best tools and materials for your project.


How to Fix Carpet Seams and Hide Them Like a Pro Read More »

cotton fringe

How to Replace Rug Fringe and Restore the Look of Your Area Rug

Area rugs bring style and warmth to any space, but nothing ages a rug faster than worn or discolored fringe. If your cotton fringe is fraying, turning yellow, or simply looking tired, don’t worry. You don’t have to throw out the whole rug. Learning how to replace rug fringe is an easy, affordable way to refresh your rug and give it a new life.

Why Fringe Gets Damaged

Fringes are more fragile than the rest of the rug. They get stepped on, vacuumed up, and pulled by pets or kids. Cotton fringe, in particular, is vulnerable to staining and yellowing, especially if it’s been bleached for that bright white look. Over time, bleach and other chemical cleaners weaken the fibers, leading to breakage.

Understand Your Rug Type First

Before replacing fringe, it’s important to know whether your rug is handmade or machine-made.

  • Handmade or antique rugs: In traditional rugs, the fringe is part of the rug’s foundation. Each knot in the rug is tied around warp threads that run the full length of the rug. The fringe is made from those same warps. Cutting it off could cause the rug to unravel. For these rugs, professional restoration is recommended.
  • Machine-made rugs: On these rugs, the fringe is added after the rug is made. It’s purely decorative and easily replaceable. That makes this kind of rug the perfect candidate for a DIY fringe replacement.

When Is It Time to Replace Cotton Fringe?

If the fringe looks dirty but is still structurally intact, you may be able to spot-clean it with mild soap and water. But if the fibers break when you touch them—or if the fringe is already falling off—it’s time to replace it. Also, if the rug is valuable or handmade, it’s safest to take it to a professional.

How to Replace Rug Fringe on a Machine-Made Rug

If you’re working with a machine-made rug, you can replace the fringe yourself. Bond Products offers cotton rug fringe by the foot, available in various colors to match your rug. Here’s how to get started:

  1. Remove the old fringe using scissors or a seam ripper, being careful not to damage the rug backing. 
  2. Measure and cut your new fringe to size. 
  3. Attach the new fringe with a heavy-duty sewing machine. Bond’s TMB lock-stitch sewing machine is ideal for this. You’ll want to stitch through the backing for a secure hold. 
  4. Secure all edges and trim excess thread.

Bond Products even offers a step-by-step tutorial video to walk you through the process.

New! Instabind Fringe Style — DIY Peel-and-Stick Option

For an even easier option, try the Instabind™ Fringe Style—a peel-and-stick, no-sew solution that’s perfect for quick and clean fringe replacement. Available in 2½” length and colors like Natural or Beige, it’s applied using just a glue gun and scissors. Simply peel off the backing, press the fringe onto the rug edge, and secure with a thin bead of latex glue for a firm, long-lasting hold. (Custom colors available on request.) 

Give Your Rug a Second Life

Replacing rug fringe is one of the easiest ways to bring life back to your area rug. Whether you’re fixing a family heirloom or just refreshing a budget-friendly piece, a clean, new fringe makes a big visual difference.

Bond Products is here to help. If you need help choosing the right color or type of cotton fringe or want advice on the tools to use, give us a call at 1-888-800-BOND. Our customer service team is happy to walk you through your project from start to finish.

How to Replace Rug Fringe and Restore the Look of Your Area Rug Read More »

color cards

Bond’s Selection of Color Cards – Take the Guesswork out!

Matching a carpet binding or serging tape to a carpet can be a challenge if you are just guessing which color might be the best match. It’s too easy to make an expensive mistake. That’s why Bond offers a variety of color cards, charts, and decks – so you can see exactly what color binding you have and if it’s compatible with your rug

Since we sell our tapes and fringes in rolls, taking a risk on a color you think will match might be an expensive mistake. For this reason, we offer color cards for Instabind, serging yarn, carpet fringe, and more. You can order one card or every sample card or chart we make. 

Different Types of Color Cards

Each of our color cards is designed to make the color selection of our products as seamless as possible. We offer: 

Bond’s 100% Cotton Oriental Replacement Fringe Board – This sample card is recommended for replacing fringes on Karastan carpets and other types of area rugs.

Bond’s 780 Veltron “Mega” Poly Color Card – This card includes 279 colors of both 7/8 and 1-1/4 inch widths. Compared to the 425 poly, Bond 780 is stiffer and has a mesh-like look that enables easier color matching to carpet. It’s priced and sold per gross yard (144 yds) and packaged 2 x 72 yd rolls per package. It also has a nice color locator on the back of the chart for quick, easy access to our specific color numbers, making ordering so simple.

Bond’s Faux Leather Binding and Rug Backing Chart – Our faux leather binding is a synthetic leather with PVC on the face with a cotton backing. This chart contains all of our 14 color samples. It comes with rug backing samples as well. Twice the value!

Bond’s 425 Polyester Color Card – This card contains 110 colors of both 13/16 & 1-1/4 inch widths. Bond 425 is made with texturized polyester yarn. Our customers often confuse it with cotton binding due to its high quality, low luster, and thickness. It’s priced and sold per gross yards (144 yds) and packaged 2 x 72 yd rolls per package.

Bond’s Cotton and Serge Tape Color Sample Deck – While not a card, this useful sample deck contains 8″ swatches of our 1-1/4″ cotton binding tapes. All of the colors are available in:

  • 1-1/4″ cotton binding
  • 3/4″ cotton binding
  • 1-1/4″ cotton serge tape

We also offer a number of other smaller charts and cards, including: 

If you work with Instabind or Bond’s cotton or polyester bindings, yarns, or fringes regularly, these cards will save you time and money because they make choosing the right color binding or yarn a snap. Call us at 1-888-800-BOND to order the charts, cards, or decks you need. Our customer service representatives will be happy to help you select the right ones. 


Bond’s Selection of Color Cards – Take the Guesswork out! Read More »

get moisture out of carpet

How to Get Moisture Out of Carpet and Prevent Damage

Carpet and area rugs are a big investment, and protecting them from excess moisture is an important part of long-term care. If humidity builds up in your home—whether from daily living, poor ventilation, or a spill—your carpet can suffer. Here we will walk you through how to get moisture out of carpet and prevent the long-term effects of humidity like mold, rippling, or unpleasant odors.

Why Moisture and Humidity Damage Carpet

Even small amounts of trapped moisture can lead to big problems over time. Here’s what can happen if humidity goes unchecked in your carpet:

  • Mold and mildew can grow, especially in natural fiber rugs. 
  • Musty smells start to settle in, affecting your whole home. 
  • Dust mites and fleas thrive in humid environments and can worsen allergies. 
  • Swollen carpet fibers may pull at seams and create a rippled, uneven look.

While synthetic carpets (like nylon carpet) are more resistant to moisture, all carpets can suffer if humidity stays too high.

How to Get Moisture Out of Carpet

Whether you’re dealing with a damp spot from humidity or drying a carpet after a minor spill, here are some effective ways to remove moisture and protect your flooring.

1. Use a Wet Vac for Water Removal

If you’re dealing with a spill, minor flooding, or a high-moisture area, a wet vac is your best friend. It’s designed to pull water directly out of carpet fibers. If you don’t own one, they’re affordable to rent at most hardware stores.

2. Set Up Fans and Airflow

Position a floor fan or box fan to blow across the affected area. You can also turn on ceiling fans or open windows to promote cross-ventilation. Airflow is one of the most efficient ways to dry out carpet and reduce humidity in the air.

3. Try the Baking Soda Trick

Sprinkle a generous amount of baking soda over the damp area and let it sit for 30–60 minutes. Baking soda helps absorb moisture and odors. Vacuum it up thoroughly with a dry vacuum to remove the residue and any lingering dampness.

4. Run a Dehumidifier

For typical humidity, adding a humidifier to any damp areas of the house should work. Set the humidifier at between 40-50% humidity. As anyone who lives in a cool climate and heats their house all winter knows, taking all the humidity out of the air will make it uncomfortably dry. You will feel that dryness in your skin and in your respiratory system. However, if the humidity is higher than that 50% range, the house will feel damp, and it will allow bacteria and mold, among other things, to grow. Keeping the house at that optimal range will make it comfortable for people but not welcoming to molds and critters. 

5. For Larger Water Damage, Call a Pro

If you’ve had a major leak or looding from heavy rainfall, don’t wait, contact a water damage restoration expert right away. Carpets and padding may need deep drying, cleaning, or replacement if the water sits too long.

Stay Ahead of Moisture Problems

Getting moisture out of carpet quickly can make the difference between saving your flooring and facing costly repairs. Keep an eye on humidity levels in your home, especially in bathrooms, basements, or any room with limited ventilation.

With regular maintenance, airflow, and the right tools, you can keep your carpets dry, fresh, and mold-free year-round.


How to Get Moisture Out of Carpet and Prevent Damage Read More »

how to bind a latch hook rug

How Do You Bind a Latch Hook Rug?

One of the most common questions Bond’s customer service team gets is how to finish or bind a carpet project. For many types of rugs, including custom pieces or carpet remnants, the answer is simple: use Instabind. But when it comes to how to bind a latch hook rug, the process is a little different. There are at least two good methods to bind a latch hook rug, and we’ll walk you through both options below.

Latch Hook Rugs: A Fun and Creative Project

Making a latch hook rug is a fun and beginner-friendly way to get into rug crafting. It’s a creative project suitable for all ages, even young children. Once the design is complete and the yarn has been hooked, it’s time to bind the edges to give your rug a clean, finished look.

Option 1: Hand Sewn Method for Binding a Latch Hook Rug

One way to bind a latch hook rug is to hand sew the edges. This method gives your rug a sturdy edge and keeps the focus on the yarn itself. 

What You’ll Need:

  • Latch hook rug with completed design
  • Scissors
  • Tapestry needle
  • Yarn or strong thread

Step-by-Step Instructions:

  1. Prepare the Edges: Most latch hook kits leave about one inch of blank rug canvas around the edges. Fold that inch toward the back of the rug. 
  2. Thread and Stitch: Thread your tapestry needle with yarn or durable thread and, using a whip stitch, sew the folded rug canvas to the back of the project at the edges. 
  3. Handle Corners: At each corner, trim away any overlapping canvas to avoid bulk and continue stitching smoothly around. 
  4. Secure the Finish: Once all four edges are sewn down, tie a strong knot in your thread or yarn. 

While this method is simple and effective, it may not look as clean as a tape-bound rug, especially if your yarn is long or shaggy, as it will naturally hide the sewn edges from view.

Option 2: Binding a Latch Hook Rug with Binding Tape

Want a more polished, professional-looking finish? Binding tape is the way to go.

What You’ll Need:

  • Binding tape (choose a color that complements your rug)
  • Sewing machine
  • Pins
  • Needle and thread for hand sewing

Step-by-Step Instructions:

  1. Trim the Canvas: Leave two full grid squares (about ½ inch) of canvas around the edge of your design. 
  2. Attach Binding Tape: Lay the binding tape along the edge of the rug, as close as possible to the hooked design. Pin it in place. 
  3. Sew Each Side: Using a sewing machine, stitch the tape securely to the canvas edge. Repeat this process with a new tape strip for each side of the rug. 
  4. Fold and Finish: Fold the loose edge of the tape under the rug to cover the raw canvas. Pin and then hand sew it in place using an overcast stitch. 
  5. Tie Off: Secure your stitches with a tight knot when finished. 

This method gives your latch hook rug a crisp, tailored edge and protects it from unraveling over time.

Final Touches: Backing Options for Rug Protection

Once your latch hook rug is fully bound, it’s ready to be displayed as a wall hanging or used on the floor. If you’re placing it on a hard surface, consider using one of Bond’s rug backing products. These help protect your floors from scratches and prevent the rug from slipping, which is especially important in high-traffic areas.

Whether you’re crafting for fun or creating a long-lasting piece for your home, taking the time to bind your rug properly makes all the difference. Enjoy your beautiful, custom-made latch hook rug! 


How Do You Bind a Latch Hook Rug? Read More »

install artificial turf

What Do You Need to Install Artificial Turf?

Installing artificial turf can transform your outdoor space into a low-maintenance, evergreen area. Whether you’re creating a backyard oasis, a pet-friendly zone, or a play area, proper installation is key to ensuring longevity and aesthetic appeal. Here’s a comprehensive guide to help you through the process.

What Is Artificial Turf Exactly?

First of all, it helps to understand how turf is made and what it’s constructed of so that you will not be tempted to skip steps or use the wrong materials. Artificial turf is an investment. It costs money to put in, but after that, unlike a lawn that needs to be watered, fertilized, and mowed, it’s free. So what is artificial turf?


The Synthetic Turf Council describes artificial turf as “a grass-like ground cover that replicates natural grass.” It is composed of synthetic filaments of nylon, polyethylene, or polypropylene threaded through a backing that is designed to let water through. There are many types of artificial grass and these vary in appearance and quality, but these mimic the types of grasses that grow in different geographical areas. 

Installing Your Artificial Turf

Preparing the Ground

You need a solid foundation for artificial turf installation. Your first step will be removing existing grass, weeds, and debris. Use a sod cutter or tiller to clear the area thoroughly. Next, lay down a base layer of crushed aggregate, approximately 2 to 4 inches thick, to facilitate drainage and provide stability. Compact the base to create a smooth surface. Finally, install a weed barrier fabric over the base to prevent unwanted plant growth. 

Laying and Securing the Turf

Roll out the artificial turf over the prepared area, allowing it to acclimate for a few hours. Trim the edges using a sharp utility knife to fit the space precisely. When joining multiple pieces, ensure the grain of the turf fibers aligns for a seamless appearance.

Seaming the Turf

For joining turf sections, Bond Products offers a hot melt turf seaming method that simplifies the process:

  1. Turf Tape: Place Bond’s turf tape along the seam line.
  2. Seaming Iron: Use a high-temperature seaming iron to activate the adhesive on the tape.
  3. Seam Sled: Use a seam sled to press the turf into the adhesive, ensuring a strong bond and straight seam.

This method eliminates the need for messy glues and provides a durable, weather-resistant seam.

Securing the Turf

Anchor the turf to the ground using 6-inch galvanized nails, spaced every 6 inches along the perimeter and seams. This prevents movement and ensures the turf remains flat and secure.

Applying Infill

Infill materials, such as silica sand or crumb rubber, are spread over the turf to help the blades stand upright and provide cushioning. Use a drop spreader to distribute the infill evenly, then brush the turf with a stiff broom to work the infill into the fibers. This step enhances the turf’s appearance and performance.

Maintenance Tips

Artificial turf requires minimal upkeep:

  • Regular Cleaning: Remove debris and rinse the turf with water to keep it clean.
    Brushing: Periodically brush the turf to maintain the upright position of the fibers.
  • Infill Top-Up: Check infill levels annually and replenish as needed to ensure optimal performance.

FAQs

Q: Can I install artificial turf myself?
A: Yes, with the right tools and preparation, you can install artificial turf yourself.

Q: How long does artificial turf last?
A: High-quality turf can last 15 to 20 years with proper maintenance.

Q: Is artificial turf pet-friendly?
A: Absolutely. It’s durable, easy to clean, and resistant to pet waste.

Q: Where can I purchase installation tools and materials?
A: Bond Products offers a comprehensive range of turf installation supplies, including turf tape, seaming irons, and seam sleds.

Good luck with your artificial turf project. Don’t hesitate to call Bond Products at (888) 800-2663 if you have questions. Our team is here to assist you with all your artificial turf installation needs.

What Do You Need to Install Artificial Turf? Read More »

Close the CTA

All NEW customers use code

WELCOMETOBOND & save 5% today!

Scroll to Top