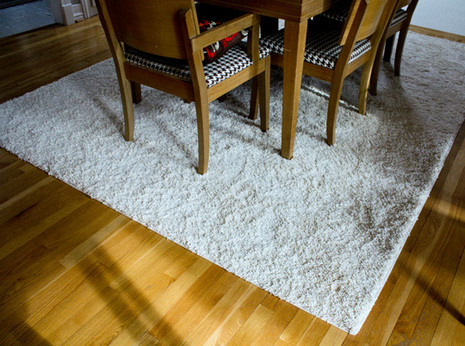
We always appreciate it when our customers love our products so much that they share their personal experiences with them, so we want to highlight a review from Mod Home Ec Teacher on how to bind a carpet remnant to make a custom-shaped area rug with Instabind. DIY carpet binding has never been so easy!
“Carpet binding has always seemed to be something for which the DIY-er needs a professional. Well, not anymore!”
Can You Bind Carpet Yourself?
If you’re wondering how to do your own DIY carpet binding, it really is quite simple. You do not have to send area rugs away to a carpet binder to create your own beautiful custom area rug from a remnant. With Instabind, this can be a fun weekend project. You simply cut your carpet remnant to size, measure your Instabind and attach it to the raw carpet edges. No sewing necessary!
You will need the following:
- A hot glue gun
- Scissors
- Clear tape
- Instabind
There are so many colors and styles of Instabind available, including:
- Regular binding style
- Cotton binding style
- Synthetic serge binding style
- Cotton serge style
- Cotton rope style
- Rope edge style
- Outdoor marine style
- Safety edge style
- Faux leather style
- NEW Fringe binding style
We even sell an Instabind Starter Kit to make using it even easier. If you’re wondering which style of Instabind to choose, our rule of thumb for selecting a binding is: if it’s a cotton or wool rug or carpet, use a natural (cotton) binding or serging style. If it’s a synthetic rug or carpet, use a synthetic binding or serging style. The highest quality look is the cotton one, but our synthetic Instabind options look great too.
Let’s Get Started!
First, you trim off any strings or irregularities along the sides of the carpet and make sure that all sides are straight. It may be easier to use a carpet cutter and a straight edge to achieve straight lines and sharp corners.
Take the Instabind, and make a clean cut. Pull the paper on the binding back, and apply it to the carpet in the middle of one cut edge. Then extend the Instabind past the corner of the carpet, using the corner as a guide. Snip the flat part of the Instabind, stopping at the piping. With the paper turned back, overlap the backing while rounding the corner. Continue this process around the carpet until you reach where you started. You can readjust the Instabind if you need to at this stage in the project. Using your starting point as a guide, make the finishing cut with your scissors and trim any excess strings.
Next, seal the beginning and ending pieces of the Instabind together with a bead of hot glue. Use your glue gun to apply a ⅛” bead of hot glue between the edge of the Instabind and the carpet. Hold this in place a few minutes to let the glue set. Continue gluing all the way around the carpet. For a more finished looking back, trim the Instabind backing at a 45 degree angle.
Now you have a beautiful carpet you can use in your home. Using Instabind to transform a remnant or fix a damaged rug is much less expensive than the price of an area rug, even an inexpensive one. Why not try this project for yourself?
Call Bond Products for All of Your DIY Carpet Binding Needs
Always feel free to contact us or call us at 1-888-800-BOND if you have any questions about the products you may need for your carpet binding or flooring needs. We are happy to help.


